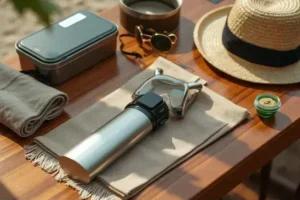
Ever come home with half your suitcase untouched—‘just in case’ sweaters, extra chargers, three pairs of sandals? We’ve all been there. The weight, the fees, the regret.
Overpacking isn’t a packing problem; it’s a psychology problem. Uncertainty spikes anxiety, so you add backups (then backups for the backups). That “what if?” tax costs real money in overweight fees, slows you at security, and steals headspace you’d rather spend on the trip.
Here’s the thing: by the end, you’ll have a clear system, a category-by-category master list, and a single decision rule—does this earn its weight? You’ll also get a travel packing list printable free you can customize for clothing, toiletries, documents, electronics, and health. Ready to pack lighter without the what-ifs? Start with why we overpack.
Why We Overpack: The Psychology And How To Stop
Why do smart travelers still stuff a ‘just-in-case’ jacket and three chargers into a carry-on? It isn’t laziness—it’s psychology.
Worried you’ll forget something essential? That fear triggers loss aversion and anticipated regret, terms popularized by Daniel Kahneman’s work in behavioral economics. Here’s the thing: the American Psychological Association notes that decision fatigue pushes us toward safe-feeling choices—like packing backups—especially when we’re stressed before a trip.
Cognitive Biases That Fill Your Bag
| Bias | What It Makes You Do | Quick Fix |
|---|---|---|
| Loss Aversion | Pack “just in case” items you won’t use | Pre-commit to a list cap and color palette |
| Optimism Bias | Assume you’ll sweat, swim, hike—so pack for all | Plan around actual itinerary blocks, not fantasies |
| Decision Fatigue | Throw extras in at the last minute | Stage and audit 24 hours before departure |
| Scarcity Mindset | Fear you can’t buy basics at destination | Set a $20 “buy there” rule for low-risk items |
| Sunk Cost | Keep heavy gear because you purchased it | Ask: does it earn its weight today? |
💡 Pro Tip: Weigh your bag after packing cubes are in; pre-check your airline’s carry-on allowance and overweight luggage fees. The TSA 3-1-1 liquid rule is your friend—smaller bottles kill toiletry bloat.
Picture this scenario: you’re at the counter, bag at 52 lb, agent eyeing the scale. You pull sneakers and a hoodie, stress spiking, while a $75 fee looms—gold coins slipping from your budget, metaphorically speaking.
So how do you override the brain’s alarms without risking comfort?
- Define the trip profile: activities, weather range, laundry access—10 minutes on a notepad.
- Set a hard container limit: one carry-on + personal item; use a luggage scale to pre-verify.
- Do outfit math: 3 tops × 2 bottoms = 6 outfits; stick to one neutral palette.
- Rule of One: one jacket, one swimsuit, one sneaker—add only if the itinerary demands it.
- Stage and audit: lay everything out, remove duplicates, cross-check a master checklist.
- Risk plan: if it’s under $20 and easy to find, buy it there; travel insurance and credit card perks can cushion delays.
What actually works might surprise you—it’s not more stuff, it’s one simple planning move you’ll see next.
Build Your Trip Profile: Weather, Itinerary, Laundry, And Bag Rules
What if you could predict your suitcase—before a single item hits the bed? Build a simple trip profile, and packing stops feeling like guesswork.
Start with weather, not vibes. Look at highs and lows, dew point (comfort indicator), wind chill, and probability of rain. The National Weather Service recommends using multi-day trends, since single-day spikes can mislead you and inflate your clothing choices.
Next, map your itinerary into blocks: transit, work meetings, city walking, beach time, fine dining. Why? Footwear and outerwear are driven by time-on-feet and dress codes. Then confirm bag rules—carry-on linear dimensions, personal item size, and any strict weight caps that low-cost carriers love to enforce. IATA offers general size guidance, but your airline’s policy always wins.
💡 Pro Tip: Set a 10-minute “profile window” 7 days out, then a 2-minute refresh 24 hours before departure. Trend over time beats a last-minute forecast swing that triggers panic-packing.
Here’s the core checklist you’ll fill out—fast, clear, and actionable.
- Weather Band: High/low, dew point, rain chance, wind. Decide outer layer and fabric weight.
- Itinerary Blocks: Daily segments with footwear notes; mark any dress code or gear.
- Laundry Access: Yes/no, which day, detergent plan (pods or sink soap). Enables outfit re-wear.
- Bag Rules: Size in inches/cm, weight limit, personal item dimensions. Prevents last-minute fees.
- Constraints: Medical needs, tech chargers, voltage adapter, eSIM setup. Avoids costly airport buys.
- Risk Budget: Set a $20 “buy there” threshold for small gaps so you don’t overpack backups.
In practice: picture this scenario—five days in a European capital, forecast 52–68°F, light rain, moderate dew point. You’ve got one laundry chance on day 3 and a 22 × 14 × 9 in carry-on with a 17 lb cap. Your profile yields two bottoms, three tops, one light shell, a packable umbrella, and one sneaker. You skip the heavy hoodie (1.2 lb saved) and add a travel-size detergent instead. Net result: fewer pieces, zero stress at the scale.
And this is exactly where most people make the most common mistake—misreading the itinerary blocks and packing for fantasy days rather than real ones…
The Master Packing List By Category: Clothing, Toiletries, Documents, Electronics, Health — Does This Earn Its Weight?
Your bag gets full for a simple reason—you’re solving every hypothetical. The master list flips that. It asks one question before anything goes in: does this earn its weight?
Here’s the thing: an item “earns it” when it scores high on three factors—frequency of use, low replaceability at destination, and high risk if missing. If it’s rare use, easy to buy, and low risk, it stays home. Simple, calm, and lighter.
| Item | Earns Its Weight If | Why |
|---|---|---|
| Merino T‑Shirt | Worn 2–3 times | Odor-resistant; reduces total shirts |
| Bulky Hoodie | Cold daily + no mid-layer | Otherwise swap for light shell |
| Universal Adapter | Different plug type confirmed | IEC plug mismatch = dead devices |
| Mini First‑Aid Kit | No 24/7 pharmacy nearby | High impact if needed |
Clothing: two bottoms, three tops, one layer; neutral palette. Add socks for each active day, one dress-up piece if your itinerary requires it.
Toiletries (TSA 3‑1‑1 sized): decanted shampoo/conditioner, solid bar soap, mini SPF, razor with cover, prescription creams. Refill at home to control cost-per-trip.
Documents: passport + copies, payment cards, travel insurance details, essential bookings. The U.S. Department of State notes many countries require six months’ passport validity—check yours before you pack.
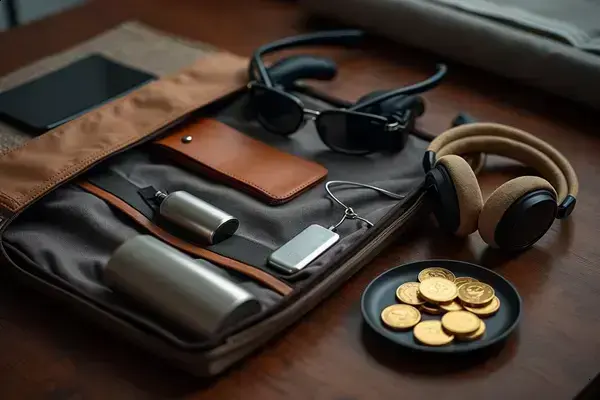
Electronics: phone, eSIM or SIM tool, power bank (10,000 mAh), universal adapter, short cables. Confirm dual-voltage 100–240V on chargers to avoid heavy converters.
Health: prescriptions in original labeled containers, pain reliever, motion-sickness tabs, rehydration salts, blister care. The CDC’s travel health guidance prioritizes meds you can’t easily replace abroad.
💡 Pro Tip: Stage everything, then remove one item per category. If you can name a cheap, local fallback, it didn’t earn its weight.
In practice: a week-long city trip with one laundry day means three tops, two bottoms, one rain shell, one sneaker, and a compact kit. You skip the second jacket, add blister patches instead, and keep a slim power bank for transit delays—money saved, stress down.
What actually drives space savings next isn’t magic gear—it’s a handful of packing techniques most travelers overlook…
Space-Saving Techniques That Actually Work: Packing Cubes, Rolling, And Outfit Math
Wish your carry-on zipped without a wrestling match? You don’t need new gear—you need tighter technique and smarter outfit math.
Here’s the thing: space comes from structure, not shoving. A simple capsule—two bottoms, four tops, one outer layer—creates 8+ outfits with less volume and fewer shoes. According to REI Co-op packing guidance, compression systems shine for soft layers but can wrinkle structured fabrics, so match the method to the garment.
| Method | Best For | Trade-Off |
|---|---|---|
| Rolling | Knits, gym wear, tees | Good visibility; mild wrinkles possible |
| Folding (Folder Board) | Dress shirts, slacks | Crisp lines; less compressible |
| Packing Cubes | Category control, quick access | ~10–15% space gain; cube weight adds up |
| Compression Cubes/Bags | Puffies, fleeces, socks | ~20–30% volume cut; more wrinkles |
💡 Pro Tip: Fill cubes to 90% and zip while pressing from the far edge to the zipper—air escapes more evenly, which prevents that lumpy “balloon” effect and keeps the shell square for tight stacking.
How To Pack Tighter In Minutes
- Build a 2-4-1 capsule: two bottoms, four tops, one outer layer—one palette so everything mixes.
- Pre-roll soft items: roll tees and base layers into cigar-tight logs; stack by outfit inside a cube.
- Fold structure smart: place dress shirts in a folder board or flat on top to avoid compression creases.
- Compress in layers: use one compression cube only for bulky knits; stop once zippers meet without strain.
- Stack by density: heavy cubes near the wheel side; light items at the lid for balance during transit.
- Cable corral: short cables in a mini cube; power bank mid-bag to protect ports.
- Scale and shake: weigh the bag, then do a gentle shake—if contents drift, add a final strap.
In practice: picture this scenario—four-day city break, one pair of jeans, one chino, four tops, a light shell, underwear in a compression cube. Rolling plus a single compression cube cuts volume about 25%, letting a pair of low-profile sneakers slide along the wheel well with room to spare.
What actually works might surprise you—the printable checklist turns these moves into a one-page preflight routine you can reuse forever…
Free Printable Packing List You Can Customize For Any Trip
You don’t need a bigger bag—you need a smarter list you can tweak in seconds. A printable that adapts to your trip removes the guesswork fast.
Here’s the thing: a modular checklist keeps you honest about space, airline limits, and real plans. It also bakes in must-follow rules like TSA’s 3-1-1 for liquids and CDC guidance on carrying prescriptions in original containers.
💡 Pro Tip: Print on Letter/A4 and slide it into a sheet protector; use a fine-tip dry-erase to update per trip. Prefer digital? Save a PDF in your phone’s Files app and check items as you stage them.
What’s Inside (Modular Sections):
- Trip Profile: dates, weather band, dress codes, laundry day.
- Clothing: 2 bottoms, 3–4 tops, 1 layer, socks/underwear by activity.
- Toiletries (TSA 3‑1‑1): decanted liquids, solids where possible, razor cover.
- Documents: passport, payment cards, insurance details, key bookings.
- Electronics: adapter, cables, power bank, eSIM/SIM tool.
- Health & Meds: prescriptions, pain relief, rehydration salts, blister care.
- Essentials: sunglasses, hat, reusable bottle, sleep mask.
- “Buy There” List: low-cost items under your $20 threshold.
- Weigh‑In & Fees: bag weight, airline cap, notes.
How To Customize Your Printable
- Fill the Trip Profile first: add highs/lows, rain chance, dress codes, and laundry access—this sets your clothing cap.
- Set category limits: write “2-4-1” (two bottoms, four tops, one layer) right on the sheet to block extras.
- Mark non-negotiables: medications, documents, and chargers get starred so they pack first.
- Color-code by bag: carry-on items in blue, personal item in green—keeps airport checks painless.
- Use the “Buy There” rule: list cheap, replaceable items you’ll pick up on arrival to avoid backups.
- Run a 5-minute audit: cross out duplicates, confirm TSA 3‑1‑1, and note bag weight vs. airline cap.
- Store it smart: keep the sheet in your carry-on sleeve; re-use and update post-trip.
In practice: picture this scenario—three-city trip, one laundry on day 4. You cap clothing to a 2-4-1 capsule, star your prescriptions, and move sunscreen to “Buy There.” The result? A lighter bag, fewer decisions, and zero counter repacks.
For complex medical needs or restricted items, confirm requirements with your clinician and airline before you travel. Once this printable becomes your preflight habit, packing stays simple and repeatable every time.
Pack Lighter With Confidence
You’ve got a clear system now: profile first, list second, technique last. The big three are simple—build your trip profile, use the master checklist by category, and apply outfit math that fits airline rules. If you take just one thing from this guide, let it be: create the profile and ask “does this earn its weight?” before anything hits your bag. Your travel packing list printable free keeps you honest and calm.
Before, packing felt like roulette—what-ifs, overweight fees, and a messy floor. Now it’s structured. You know your weather band, laundry day, and bag limits. You cap outfits, roll the right fabrics, and run a quick audit. Lighter bag. Faster checkpoints. More headspace for the fun stuff.
Which part will you customize first—your trip profile, the 2‑4‑1 outfit plan, or the “buy there” list? Tell us in the comments!
Ava Marie Caldwell is a passionate traveler, travel planning writer, and the founder of this blog — built for people who want to travel more, stress less, and actually enjoy the planning process.
After years of figuring things out the hard way — overpacking for every trip, booking the wrong accommodation, missing cheap flight windows by days, and once arriving at an airport without a printed visa — Ava decided to document everything she learned and put it in one place.
This isn’t a luxury travel blog with sponsored resort stays. Ava is not a certified travel agent or tourism professional — just someone who has taken the trips, made the mistakes, and found the systems that actually work for real travelers with real budgets and real lives.
Every article on this site is researched with care, written from genuine experience, and designed to save you time, money, and the kind of stress that ruins the first day of a trip you’ve been planning for months.
Whether you’re packing for your first international flight, planning a road trip with the family, or finally doing that solo trip you’ve been putting off — this blog was built for you.
When she’s not writing or planning her next trip, Ava is testing new packing systems, comparing flight booking tools, and trying to convince everyone that a carry-on is always enough.